
After years of growth and development, cloud computing has matured. Unlike on-premises deployment it ensures a fast infrastructure setup. Building a physical infrastructure may take weeks, while creating a cloud infrastructure may require only several hours. Other compelling advantages of cloud services are scalability, reliability, high performance, and security.
We use these services in order to be more flexible in “continuously” expanding your resources within minutes.
We have experience in Google Cloud, Docker and Kubernetes. It allows us to run any kind of scalable web applications
.We use Google Cloud Container Engine for deployment of our applications, which have different requirements for launching. We can run a lot of environments by docker technology using, for example, one application which needs CentOS platform and 100 Mb of RAM. We launch this application in Google Container Cluster near other various applications and they do not interfere with each other. Every application is running in their own isolated environments.
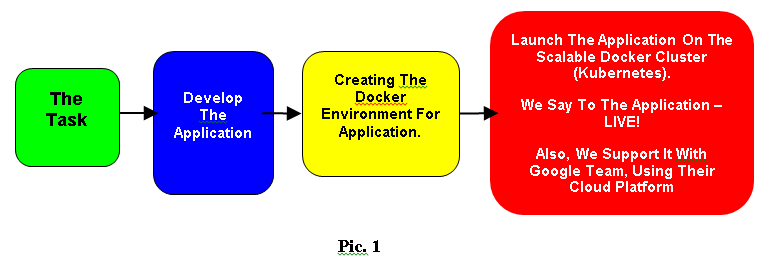
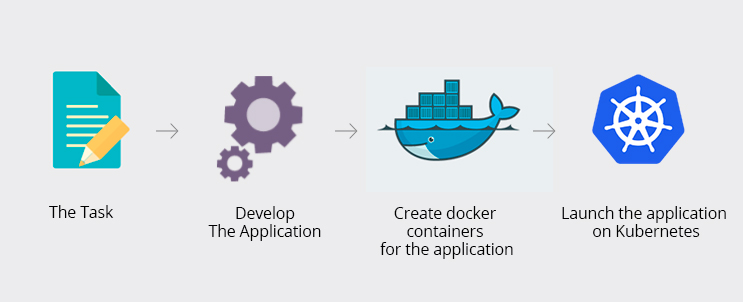
We are working on the following algorithm (Pic. 1).
Our Development Process
When we receive the request to develop an application, we assign it to our developers. Next, when the application is ready for release, our DevOps specialist prepares the docker environment for the mentioned application.
Docker is a great platform for launching each application in its own environment (CentOS, Ubuntu, Debian or other base image).
To launch the application, we use the Google Container Engine, that provides the docker cluster and private docker registries.
Before launch, we need to prepare the application description for Kubernetes (json or yml file). First of all, we need to build the image and push it into the private repository. We identify the based image in the description file. If the application is simple, we do not need to describe the difficult json or yml description file (Pic. 7), we only run the application with the docker image that we have prepared before.
If the application needs the Public IP-address, then the Google Cloud will provide it for the application and we can fix it as static.
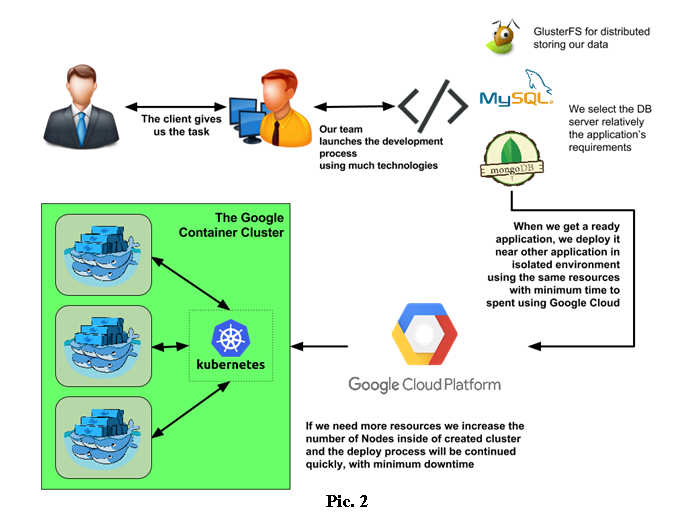
The common process of our working can be shown as below (Pic. 2):
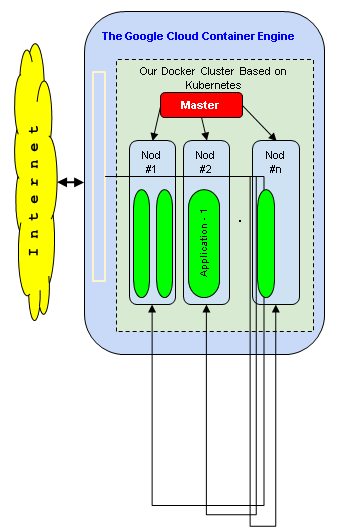
We use the Kubernetes docker cluster for hosting our application. It looks similar to the picture below (Pic. 3).
Usage of the following architecture helps to use the computer resources more effectively because some applications need a small amount of memory but the remote instance has a lot of it. Every application can be launched on its own Linux-Environment. Do not look on the main instance of the Linux OS type where the application is hosted.
The Google Cloud Container Cluster is as scalable as we wish. If we have a lot of new applications to host, we only add new Nodes to our cluster and launch the application in it. If the Nod has a lot of free resources, the cluster decides what application it launches on what Nod (instance).
How Buildateam.io Use Flexible Services To The Storing Of Data In The Network Cloud
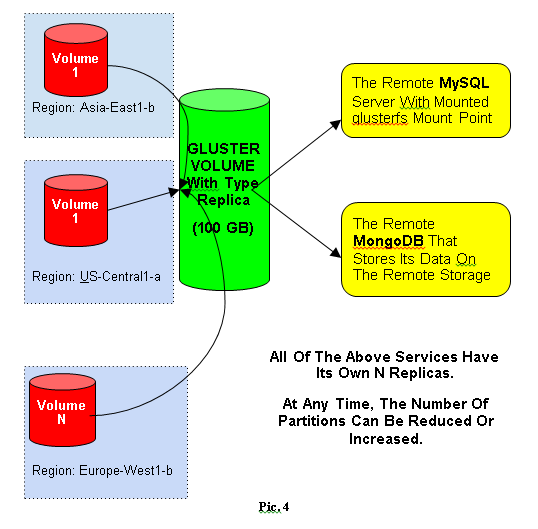
We can make as many replicas as we need and we can increase our existable cloud storages to size as needed.
We can also use distributed file systems, for example, glusterfs, which can be used for simple replication between the remote servers. If our task is to increase our remote storage, we only add a new volume from various remote servers in the storage by gluster shell command. Afterwards, our cloud storage increases automatically.
 Use Of Docker Cluster In The Final Application Launch
To launch the application, we can use the docker in some of the remote servers. When we need to increase the resource, we may be faced with some problems transferring the environment.
Why We Use Google Cloud And Kubernetes
The Kubernetes is used to manage a docker cluster.
The Kubernetes can be installed on every Linux host that has docker for example. Also the Kubernetes is used for managing a docker cluster in the Google Container Engine cluster by default.
When the cluster is launched, a user can enter into the Kubernetes web interface. To get access to the web dashboard, we execute the command kubectl cluster-info like above (Pic. 5).
If the user goes by the url (Pic 5, 2) he will see the next web interface (Pic. 6).
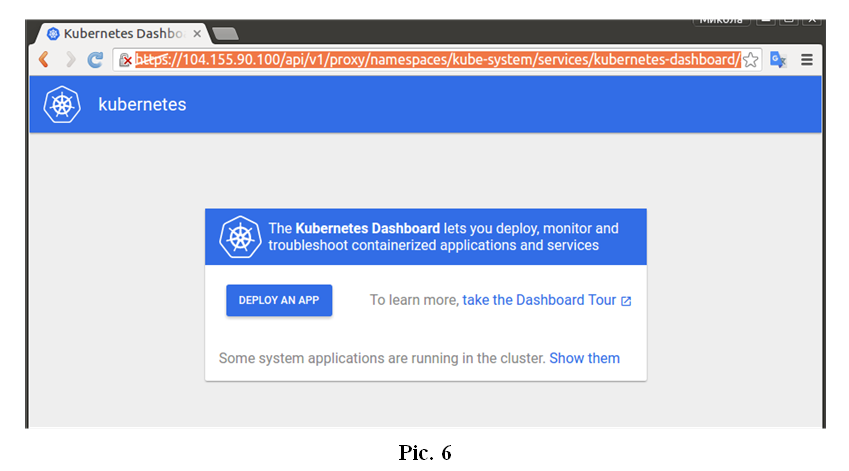 The information mentioned above means that the user wants to scale the cluster. The user can do that at any time because the Kubernetes supports this feature. The user can decrease the number of nodes or even increase it.
To create a cluster for applications that consists in a docker environment, the user can use the GCloud Web Console or the GCloud Console Application.
We Use The Google Cloud Shell Application To Manage Our Clusters
The GCloud application can install the kubectl as well. Kubectl is the application used to manage the Kubernetes cluster. The user needs to pass the authentication procedure to get the Google Cloud Access for his console. This is all that needs to be done.
For launching the application in Kubernetes cluster, the user needs to prepare the docker image which is the base of application. In order to do this, the user needs to create the private docker registry and Google Cloud provides it for the users.
The user creates the docker registry (Google Container Registry) and afterwards the user can push the docker images from the local computer into the remote private registry. When the images are located in registry, the user can launch the application based on the user’s private docker image that can contain the private data as well. The user can launch the application which is based on public docker images from another registry. One example is the official docker registry docker.io.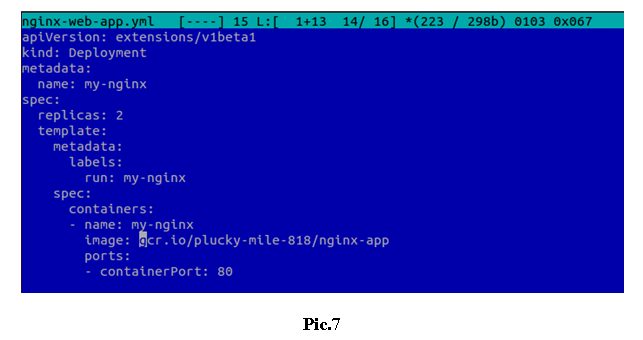
The private registry is needed when the user wants to store some private information with the application. When the user launches the application, he can set only the input environment, links to applications containers, and external volumes for application.
In order to launch the application, it is required to describe it by using the yml (Pic. 7 above) or json file with the description of containers that will be running on container cluster.
The description file of the application shows the application-based image or a group of containers that are needed to work on the whole application. This file is like the docker-compose.yml but it has own format that is understandable to Kubernetes.
When the description file is ready, it can be used to launch the application. The simple way to do this is to use the web-interface. However, the console application kubectl has more abilities to launch the user’s application in docker cluster. Thus, we always use it, if it is required to make more tuned applications’ environment. Each application gets its own external IP address after it is launched. Kubernetes makes this step independently without any additional user’s actions.
An Example On How We Manage GCloud Resources
So, let’s launch the simple application based on the nginx official image. In the dockerfile, I will change the index page, and we will see it in the web browser.
Installing The GCloud Utility Locally
$ wget https://dl.google.com/dl/cloudsdk/channels/rapid/downloads/google-cloud-sdk-116.0.0-linux-x86_64.tar.gz
$ tar -xf google-cloud-sdk-116.0.0-linux-x86_64.tar.gz
$ cd google-cloud-sdk
$ ./install.sh
$ gcloud init
Installing Kubectl With GCloud Utility Help
$ gcloud components install kubectl
Create A Cluster (Wait For A While)
$ gcloud container clusters create mycluster --num-nodes 1 --disk-size 10
$ gloud container clusters list
 Prepare The Docker File With Changed Index Page
Log into the registry though the GCloud Utility to get push access. Build the docker image. Push the docker image into the docker registry (Google Container Registry).
$ cat Dockerfile
$ docker build -t nginx-app ./
$ docker tag nginx-app gcr.io/plucky-mile-818/nginx-app
$ gcloud docker push gcr.io/plucky-mile-818/nginx-app
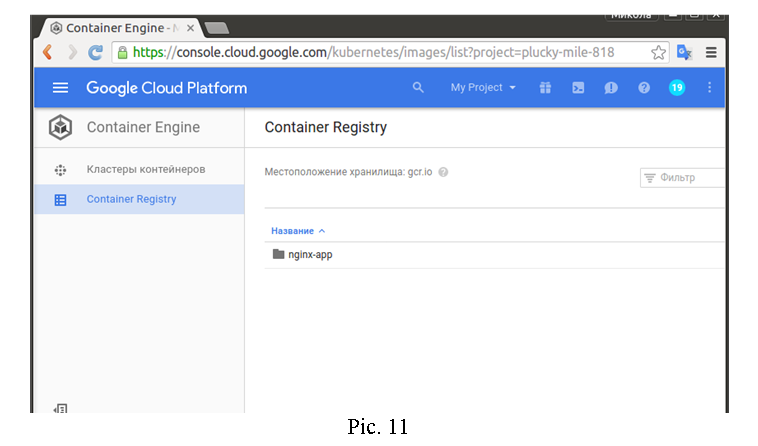
After these operations, the user can see his image in the repository through the web console of Google Cloud.
We can use this image to launch the container or group of containers in our docker cluster and no one can get access to it without necessary access rights.
Launch The Application
To launch the application, we prepare the yml or json file that describes the application. We use this file when we create the application in our Kubernetes docker cluster. If we launch the simple application, we can use only the command line parameters to launch the application (container, containers, pods):
$ kubectl run my-nginx --image=gcr.io/plucky-mile-818/nginx-app --replicas=1 --port=80
$ kubectl get pods
To release the application to the world, we launch the next command. After some time, Google Cloud will give our application the external IP-address.
$ kubectl expose deployment my-nginx --port=80 --type=LoadBalancer
To look what IP address our application got we execute the next command:
$ kubectl get services
 If we open the web browser and go by url http://130.211.94.91, we can see our index page that was described in dockerfile.
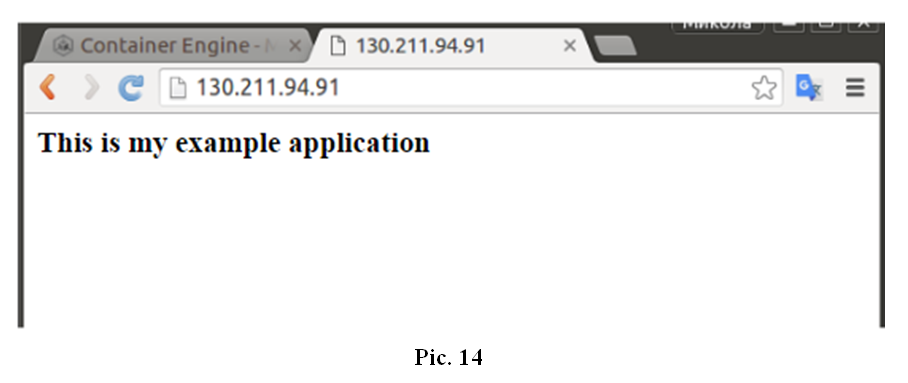 For each application, Google Cloud exposes the external IP whenever necessary. This IP address will be ours until the application is running.
If we need the static IP, it would not be a problem. We should change the type of IP in the network settings panel of the Google Cloud Console and then we can assign it to the different Google Cloud instance or services in Kubernetes docker cluster.
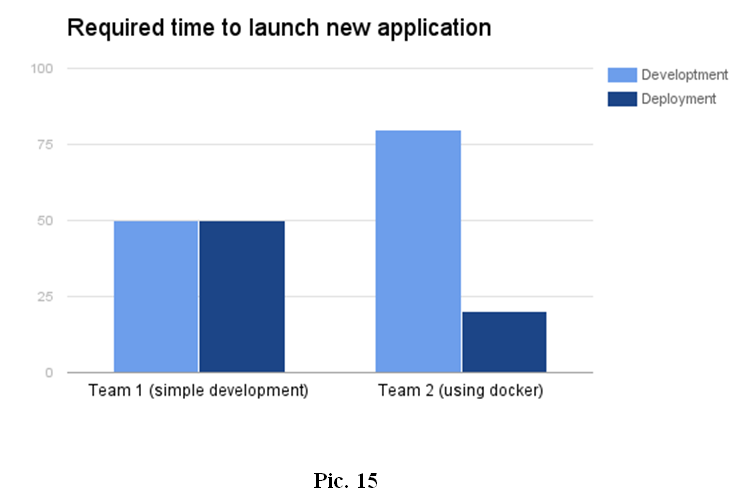
If a team uses a simple procedure during the process, it spends less time concentrating on application code. After the code is ready, the team needs to find the hosting place to launch its application. The team installs the OS, installs additional software, and set it up to make a correct launch of the application.
If we already have a platform to launch the application we decrease the deployment process significantly and use the time wisely for the development purposes.
We continuously monitor IT markets for new technologies and always test them before implementing them in our projects.
Need help setting things up or want to buy pre-configured images for your Magento Cloud Hosting?
Email us at hello@buildateam.io for an advice or a quote. Also feel free to check out our Managed Magento Optimized Google Cloud Hosting
Read more:
How To Setup Scalable Magento Kubernetes Environment on Google Cloud.


